Homemade Cranberry Strawberry Jam – A Sweet and Tangy Holiday Preserve

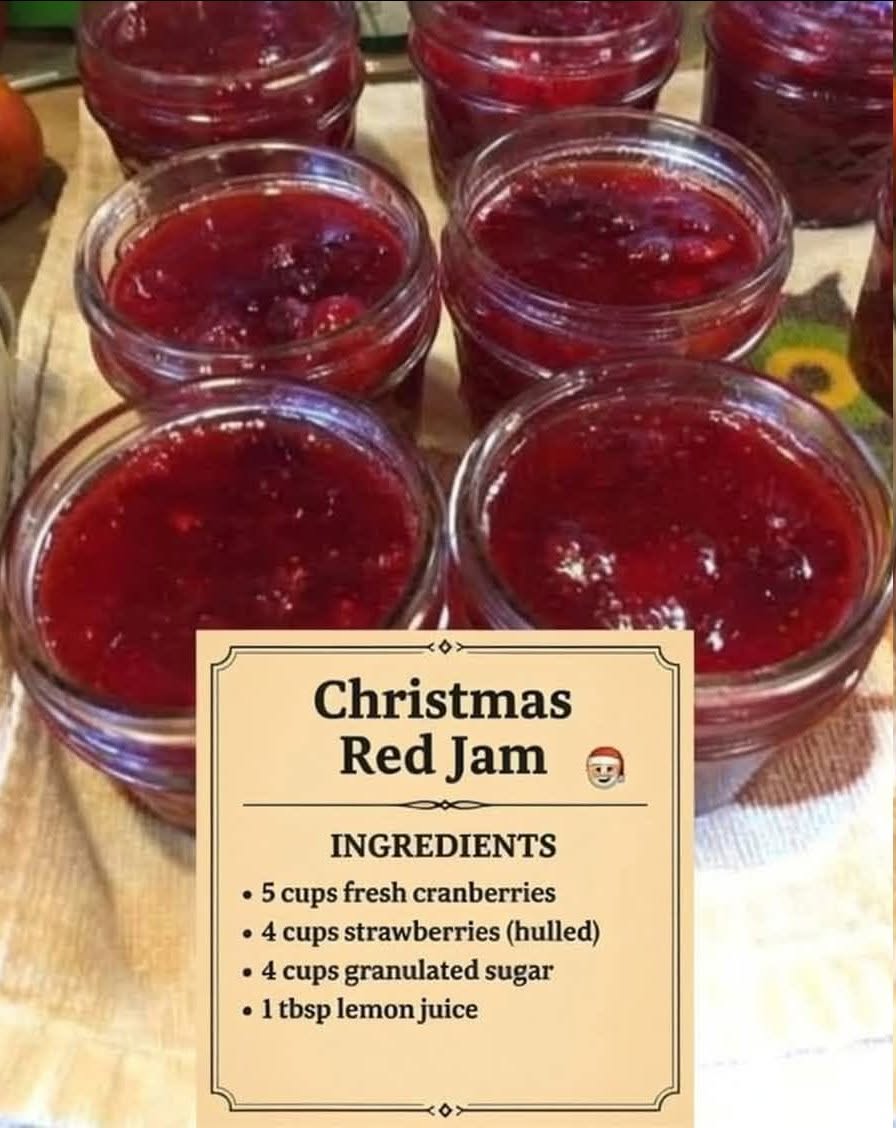
nstructions
Step 1: Prepare the Fruit
Begin by rinsing the cranberries under cool running water. Remove any damaged berries, leaves, stems, or other debris.
Wash the strawberries, remove their green tops, and cut them in half. If the strawberries are particularly large, cut them into smaller pieces.
Allow excess water to drain away before adding the fruit to the pot.
Preparing the fruit properly helps the jam cook evenly and gives it a pleasant consistency.
Step 2: Combine the Ingredients
Place the cranberries and prepared strawberries in a large, heavy-bottomed pot.
Add the granulated sugar and fresh lemon juice. Stir everything together until the fruit is evenly coated with sugar.
At this stage, the mixture may appear dry, but that is completely normal. The sugar will begin drawing moisture from the fruit as the mixture rests.
Step 3: Allow the Fruit to Release Its Juices
Let the fruit mixture stand for approximately 10 minutes.
During this time, the sugar begins dissolving and the berries start releasing their natural juices. You may notice a little red liquid collecting at the bottom of the pot.
This short resting period helps the fruit begin cooking more evenly and allows the flavors to start blending together.
Step 4: Bring the Mixture to a Boil
Place the pot over medium-high heat.
Stir occasionally as the mixture warms. Make sure to scrape the bottom and corners of the pot so the sugar does not stick or scorch.
As the fruit heats, the strawberries soften and the cranberries begin to burst. The mixture will gradually become wetter, darker, and more fragrant.
Bring the mixture to a full boil while stirring carefully. Hot fruit and sugar can bubble and splatter, so use a long-handled spoon and avoid leaning over the pot.
Step 5: Simmer the Jam
Once the mixture reaches a boil, reduce the heat to medium.
Allow it to simmer for approximately 25 to 30 minutes, stirring every few minutes. The exact cooking time will depend on the moisture content of the fruit, the width of the pot, and the heat level.
The cranberries will pop naturally as their skins soften. The strawberries will break down, creating a thick fruit mixture with pieces of berry throughout.
Continue stirring gently, paying attention to the bottom of the pot. If the jam begins sticking, reduce the heat slightly.
As the mixture cooks, the liquid gradually evaporates, the fruit concentrates, and the color deepens into a beautiful ruby red.
Step 6: Check the Consistency
After approximately 25 minutes, begin checking whether the jam has thickened.
Dip a spoon into the mixture and allow a little jam to cool. It should coat the spoon rather than immediately running off like juice.
For a more reliable check, place a small plate in the freezer before cooking. Spoon a little jam onto the cold plate, wait about a minute, and push it gently with your fingertip.
If the surface wrinkles slightly and the jam moves slowly, it may be ready. If it remains thin and watery, continue simmering for a few more minutes and test again.
Remember that hot jam is thinner than cooled jam. Avoid cooking it excessively in an attempt to make it extremely thick while still hot.
Step 7: Adjust the Texture if Desired
This jam can have either a rustic, chunky texture or a smoother consistency.
For a chunky preserve, leave the softened fruit as it is. The cranberry skins and pieces of strawberry provide texture and a homemade appearance.
For a smoother jam, gently mash some of the fruit with the back of a spoon while it cooks.
If you prefer a nearly uniform consistency, you can carefully use an immersion blender, taking precautions around the hot mixture. Do not blend if you want to preserve whole pieces of fruit.
Step 8: Remove from the Heat
Once the jam reaches the desired consistency, remove the pot from the heat.
Let it stand briefly so the most vigorous bubbling subsides. Stir gently to distribute the fruit evenly throughout the mixture.
The jam should look glossy, richly colored, and fragrant. Its sweet strawberry aroma should be balanced by the sharper scent of cranberries and lemon.
Step 9: Transfer the Jam into Clean Jars
Prepare clean glass jars before the jam finishes cooking.
Using a ladle and, if available, a canning funnel, transfer the hot jam carefully into the jars. Avoid splashing the mixture onto the rims.
For refrigerator storage, use clean containers and follow safe food-handling practices. For shelf-stable gifts, use jars and lids suitable for home canning and follow an established, tested canning procedure.
Do not assume that simply pouring hot jam into a jar and tightening the lid makes it safe for room-temperature storage.
Step 10: Cool and Store
For refrigerator jam, let the filled containers cool safely, then refrigerate promptly. Avoid leaving the jam at room temperature for an extended period.
Store the jam in the refrigerator and use it within approximately three weeks, provided it has been handled properly. Always use a clean spoon when serving.
For longer storage at room temperature, use a tested recipe specifically approved for water-bath canning, with the correct processing time for your altitude and jar size. The ingredient quantities in this recipe alone do not establish a validated shelf-stable canning method.
Once chilled, the jam will usually become thicker and easier to spread.
Cooking Method
The cooking method for this Cranberry Strawberry Jam is a traditional stovetop fruit-preserve method. It relies on heat, sugar, fruit juices, and evaporation to create a thick, flavorful spread.
First, the fruit is combined with sugar and lemon juice. The mixture rests briefly to encourage the berries to release their natural moisture.
Next, the fruit is heated until it boils. This softens the skins, breaks down the strawberries, and causes the cranberries to burst.
The heat is then reduced to maintain a steady simmer. During this stage, water evaporates from the mixture, concentrating the fruit flavors and helping the jam thicken.
Frequent stirring prevents scorching, while occasional consistency tests help determine when the jam is ready.
The final stage involves transferring the cooked mixture into appropriate containers and storing it safely.
Unlike recipes that require commercial pectin, this version depends on the fruit’s natural composition, the sugar, and sufficient cooking to reach its desired texture. Cranberries contain pectin, which can help the jam thicken, although the final result will vary according to the fruit and cooking conditions.
The History of Cranberry Strawberry Jam
see continuation on next page
